
| 일 | 월 | 화 | 수 | 목 | 금 | 토 |
|---|---|---|---|---|---|---|
| 1 | ||||||
| 2 | 3 | 4 | 5 | 6 | 7 | 8 |
| 9 | 10 | 11 | 12 | 13 | 14 | 15 |
| 16 | 17 | 18 | 19 | 20 | 21 | 22 |
| 23 | 24 | 25 | 26 | 27 | 28 |
- pandas
- keras
- pycharm
- RNN
- imread
- dataframe
- Numpy
- 삼성소프트웨어멤버십
- Button
- DFS
- Lotto
- LSTM
- install
- ipad
- Python
- 알고리즘
- pip
- Series
- synology
- CNN
- index
- SPL
- mariadb
- E-P1
- mean
- GitHub
- SciPy
- javascript
- Splunk
- GT-S80
- Today
- Total
목록잠토네 잠수함 (493)
잠토의 잠망경
 [python] cx_Oracle 설정 및 간단 사용
https://github.com/yiwonjae/Project_Book_012/blob/master/sample/sample001.py 불러오는 중입니다... 사전 준비 ① instant-client download ② cx-oracle download [사전 준비] instant-client download https://www.oracle.com/database/technologies/instant-client/downloads.html Oracle Instant Client Downloads No results found Your search did not match any results. We suggest you try the following to help find what you're lo..
git을 사용하다 보면 대용량 file upload가 필요하다. 1. git-lfs를 설치한다. https://git-lfs.github.com/ Git Large File Storage Git Large File Storage (LFS) replaces large files such as audio samples, videos, datasets, and graphics with text pointers inside Git, while storing the file contents on a remote server like GitHub.com or GitHub Enterprise. git-lfs.github.com 2. 대상 git으로 이동해서 console 실행 $ git lfs install 3. 관..
 [Windows] Tensorflow & Keras 사전 준비
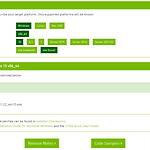
1. CUDA Toolkit 설치 (Base: 10.1) 2. cuDNN 설치 (Base: 10.1) 1. CUDA Toolkit 설치(10.1) https://developer.nvidia.com/cuda-10.1-download-archive-update2?target_os=Windows&target_arch=x86_64&target_version=10&target_type=exelocal CUDA Toolkit 10.1 update2 Archive Select Target Platform Click on the green buttons that describe your target platform. Only supported platforms will be shown. Operating System..
 5장 02 -케라스로 구현하는 RNN(순환신경망)
GITHUB https://github.com/yiwonjae/Project_Book_002/blob/master/ch05/p194.py 불러오는 중입니다... 0. 목표 항공사 탑승객의 수요를 예측한다. 1. DATA # Data Read import pandas as pd fname='data.txt' dataset = pd.read_csv(fname, usecols=[1], engine='python', skipfooter=3) data = dataset.values.reshape(-1) ShowMeDrawData(data) data는 local data를 활용한다. panda를 활용하여 csv file을 read한다. 그리고 values.reshape(-1) 통해서 data를 추출한다. 2. DA..
역순으로 만드는 법 1. sliding 기법 a[::-1] print(a[::-1]) print(type(a)) 위와 같이 할 경우 역순으로만들 수 있다.
opencv import cv2 img = cv2.imread('imgpath') cv2.imshow('img',img) cv2.waitkey() cv2.destroyWindows()
random import numpy as np a = np.random.uniform(1,2,(2,2)) # 1~2 사이의 균일한 분포로 무작위 배열 반환 b = np.random.lognormal(3,1,10) # 평균, 시스마를 이용하여 무작위 배열 반환 c = np.random.laplace(0, 1, (2,2)) # 라플라스 분포의 무자위 배열 반환 d = np.random.random((2,3)) # 2 \*3 배열 e = np.random.random((2,3)) # 2 \* 3 배열 f = np.random.rand(2,2) # 무작위 g = np.random.randn(2,2) # 표준 편차 h = np.random.randint(1,3,(2,2), dtype = int)
connectedComponents & connectedComponentsWithStats 0 0 0 0 0 0 1 0 0 0 1 0 1 0 0 0 1 0 1 0 0 0 1 0 1 1 0 0 0 0위와 같이 어떤 image에 저와 같은 배열을 갖는 이미지가 있었다. 우리가 cv2.connectedComponents(image) 를 하면 연결된 components의 개수를 반환하고 Labeling을 해준다. 0 0 0 0 0 0 1 0 0 0 2 0 1 0 0 0 2 0 1 0 0 0 2 0 1 1 0 0 0 0그럼 우리는 이것들을 분리해서 처리할 수 있다. 또한 cv2.connectedComponentsWithStats() 는 중심 좌표 및 범위를 알려주기 때문에 대상(component)를 특정화 시킬수..